We want our website to help you find the resources you need to be healthy through good nutrition and a beneficial lifestyle. We get no compensation for any listing. None of the links are affiliate links.
Here are some of the resources we provide:
Health and Nutrition Information
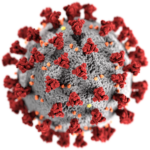
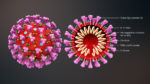
- Coronavirus/COVID19, including special sections on wearing masks, germ vs. terrain theory, and COVID vaccines
- Vaccines
- Homeopathy
- General Health Information
- and More
Resources for
- Foods: pastured meats, healthy fats, herbs, supplements, and more
- Personal care products
- Organic clothing
- Baby products
- Cookware
- Household products
- Garden and farm products
- and More
Real Food Restaurants: Houston area restaurants that have some selections meeting some real food requirements such as local food, organic choices, pastured meats, etc. None meet all WAPF guidelines.
For Houston area resources, the Local Food & Milk page of WAPF-Houston has a list of pastured meats, eggs, real milk, produce, and much more.
We add to these resources frequently. Check back often for new listings.